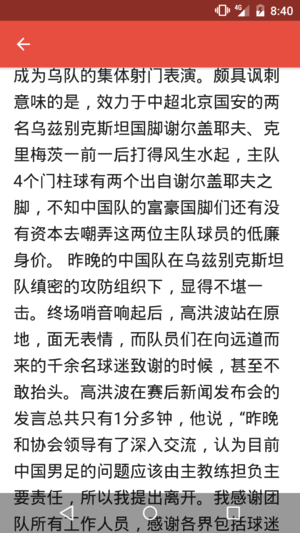
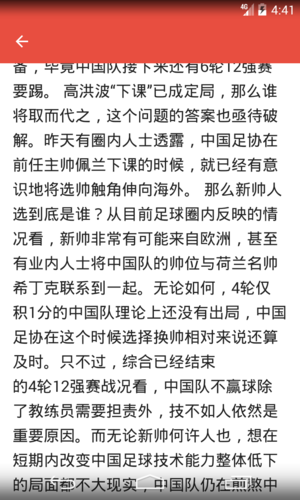
沉浸式状态栏是api 19之后引入的,KitKat应该算是一次比较大的更新了,像是Transition,art runtime,storage access FrameWork(这个有空研究下),另外就是这个被官方称为Full-screen immersive mode的特性了。具体来说,App可以将展示的区域拓展到statusBar的位置了。我觉得直接叫statusBar就好了,大部分人应该也能理解这就是手机上显示”中国移动”还有显示手机电量那一块的长条,宽度是match_parent。高度的话,据说是25dp,然后6.0上给改成了24dp。不过这不是重点
1.最初的做法
看到有人推荐使用SystemBarTint这个class,刚上来觉得也挺好用的,就是一个java class,直接复制粘贴到项目里,改一下package name,无脑使用即可。原理的话,看过源码后,大致明白是在statusBar的位置添加一个new View,然后持有这个view的引用,接下来就可以做常规的setBackground或者setBackgroundColor了。初始化时的关键代码如下
private void setupStatusBarView(Context context, ViewGroup decorViewGroup) {//这个decorViewGroup指的是activity.getWindow()
        mStatusBarTintView = new View(context);
        LayoutParams params = new LayoutParams(LayoutParams.MATCH_PARENT, mConfig.getStatusBarHeight());
        params.gravity = Gravity.TOP;
        if (mNavBarAvailable && !mConfig.isNavigationAtBottom()) {
            params.rightMargin = mConfig.getNavigationBarWidth();
        }
        mStatusBarTintView.setLayoutParams(params);
        mStatusBarTintView.setBackgroundColor(DEFAULT_TINT_COLOR);
        mStatusBarTintView.setVisibility(View.GONE);
        decorViewGroup.addView(mStatusBarTintView);
    }
一切看起来都很美好
2. 直到碰到了fitSystemWindow = ture
几个月前曾经在项目里写过一个普通的Coordinatelayout内部CollapingToolbarLayout的沉浸式状态栏实现,当时为了赶进度一直试到夜里2点才尝试出在4.4和5.0以上手机都能满意的效果。现在想想有些事还是能够事先搞清楚的好,被动学习的代价实在太大。当时的方法是给Toolbar添加了一个顶部的padding,具体原理也不大清楚。
但实际上并不总能一直

3. 使用CollapsingToolbarLayout时的问题
5.0以上的手机似乎很简单
<?xml version="1.0" encoding="utf-8"?>
 <android.support.design.widget.CoordinatorLayout
     xmlns:android="http://schemas.android.com/apk/res/android"
     xmlns:app="http://schemas.android.com/apk/res-auto"
     android:id="@+id/coordinateLayout"
     android:layout_width="match_parent"
     android:layout_height="match_parent"
     android:background="@android:color/background_light"
     android:fitsSystemWindows="true"
     >

     <android.support.design.widget.AppBarLayout
         android:id="@+id/appbarLayout"
         android:layout_width="match_parent"
         android:layout_height="300dp"
         android:theme="@style/ThemeOverlay.AppCompat.Dark.ActionBar"
         android:fitsSystemWindows="true"
         >

         <android.support.design.widget.CollapsingToolbarLayout
             android:id="@+id/collapsingToolbarLayout"
             android:layout_width="match_parent"
             android:layout_height="match_parent"
             app:contentScrim="?attr/colorPrimary"
             app:expandedTitleMarginEnd="64dp"
             app:expandedTitleMarginStart="48dp"
             app:layout_scrollFlags="scroll|exitUntilCollapsed"
             >

             <ImageView
                 android:id="@+id/backdrop"
                 android:layout_width="match_parent"
                 android:layout_height="match_parent"
                 android:scaleType="centerCrop"
                 android:src="@drawable/image_19"
                 app:layout_collapseMode="parallax"
                 android:fitsSystemWindows="true"
                 />

             <android.support.v7.widget.Toolbar
                 android:id="@+id/toolbar"
                 android:layout_width="match_parent"
                 android:layout_height="?attr/actionBarSize"
                 app:layout_collapseMode="pin"
                 app:popupTheme="@style/ThemeOverlay.AppCompat.Light"
                 />
         </android.support.design.widget.CollapsingToolbarLayout>
     </android.support.design.widget.AppBarLayout>

     <android.support.v4.widget.NestedScrollView
         android:id="@+id/nestedScrollView"
         android:layout_width="match_parent"
         android:layout_height="match_parent"
         app:layout_behavior="@string/appbar_scrolling_view_behavior"
         >

         <TextView
             android:layout_width="match_parent"
             android:layout_height="wrap_content"
             android:lineSpacingExtra="8dp"
             android:padding="@dimen/activity_horizontal_margin"
             android:text="@string/newsBody"
             android:textSize="20sp"
             />
     </android.support.v4.widget.NestedScrollView>

     <android.support.design.widget.FloatingActionButton
         android:id="@+id/fab"
         android:layout_width="wrap_content"
         android:layout_height="wrap_content"
         android:layout_margin="@dimen/activity_horizontal_margin"
         android:src="@android:drawable/ic_menu_slideshow"
         app:layout_anchor="@id/appbarLayout"
         app:layout_anchorGravity="bottom|right|end"
         />
 </android.support.design.widget.CoordinatorLayout>
只要分别在CoordinateLayout,AppBarLayout和CollapsingToolbarLayout的xml属性中加上android:fitSystemWindow = “true”
java代码里添加一句getWindow().addFlags(WindowManager.LayoutParams.FLAG_TRANSLUCENT_STATUS); //注意下版本判断
或者在当前Activity的values-v19 styles中添加
就行了。实际效果就是图片完全展开时可以扩展到statusBar下面,图片收缩起来后可以让Toolbar停在statusBar下面。但同样的代码在4.4的手机上会使得实际绘图区域落到statusBar以下,statusBar位置变成带灰色遮罩的白色背景。
4. fitSystemWindow是什么意思
fitSystemWindows属性:
官方描述:
Boolean internal attribute to adjust view layout based on system windows such as the status bar. If true, adjusts the padding of this view to leave space for the system windows. Will only take effect if this view is in a non-embedded activity.
简单来说就是如果设置为true,在设置了透明状态栏或者导航栏时,此view的所有padding属性失效(透明状态栏的话,paddingTop等于状态栏高度;透明导航栏的话,paddingBootm等于NavigationBar的高度)
假定:
布局文件只是一个普通的LinearLayout(fitSystemWindow = false(默认情况)),顶部include一个toolbar(fitSystemWindow = true )
就已经可以实现4.4以下,4.4-5.0,5.0以上的各种场景了,(前提,使用Appcompat 的Theme,因为它会使用colorPrimaryDark为statusBar着色)
但我的问题在于布局文件是
CoordinateLayout> AppBarLyout> CollapsingToolbarLayout> Toolbar & ImageView
这种情况下,照理说Toolbar应该顶部留有25dp的padding,也就是fitSystemWindow = true(假设就只是这么简单)然而事实是,fitSystemWindow会让你设置的padding失效,而ImageView需要侵入到statusBar下面,也就是fitSystemWindow = false。
那就只要在toolbar的xml中添加fitSystemWindow这个属性好了。编译,运行,5.1手机,Toolbar的小箭头一部分跑到statusBar下面了,感觉就像Toolbar往上移动了25dp(这个目测的哈),不可取。
5. 查找到的一些解决方案
主要介绍原理了:
- 类似于SystemBarTint,在android.R.id.content的View中添加一个 View
Activity持有一个PhoneWindow,PhoneWindow持有一个根View,叫DecorView(是一个FrameLayout),DecorView持有一个LinearLayout,在LinearLayout下分配两个FrameLayout,一个给ActionBar(当设置主题为NoActionBar是为ViewStub),一个给ContentView。不管如何,只要我们在LinearLayout的第一个位置插入一个View就可以让ContentView下移了。简书作者ViewGroup.LayoutParams statusViewLp = new ViewGroup.LayoutParams(ViewGroup.LayoutParams.MATCH_PARENT, getStatusBarHeight()); contentView.addView(statusBarView,layoutParams)
这种方式其实已经无所谓是否需要在xml中fitSystemWindow了,因为都会通过添加最后一个View的方式把状态栏那块给遮住了。用来着色其实挺好的。
往android.R.id.content这个View里面添加一个假View,xml中fitSystemWindows
往android.R.id.content这个View的parent里面添加一个假View,xml中fitSystemWindows
6.我最后实现的解决方案(4.4,5.1均通过)
其实整个问题的关键就是你是否想要在statusBar那一块长条的位置画画。。。。
一整张imageView的话,当然希望能够把图片延伸到statusBar以下
而Toolbar则不需要延伸到statusBar以下。
我尝试了给toolbar加上padding >>失败
我尝试了给toolbar加上margin >>>> 问题终于解决
所以最后,我的xml文件中删除了所有的fitSystemWindow,在style-v19中添加了该加的东西
最后只在onCreate里面添加几段话
setSupportActionBar(binding.toolbar);
getSupportActionBar().setDisplayHomeAsUpEnabled(true);  //这个用于显示返回的小箭头,还得指明parentActivity
getSupportActionBar().setTitle("");
CollapsingToolbarLayout.LayoutParams params = (CollapsingToolbarLayout.LayoutParams) binding.toolbar.getLayoutParams();
params.setMargins(0, Utils.getStatusBarHeight(), 0, 0); //顶部加个margin就好了
binding.toolbar.setLayoutParams(params);
实际操作可能还要判断非空什么的,但大致意思如此
看起来像这样
5.1图片展开:
5.1图片收起:

4.4图片展开:

4.4图片收起:

原理就是让整个布局占据statusBar的位置,但把Toolbar往下挪一点(其实也就是这篇文章中所推荐的给contentView的给第一个childView添加marginTop的方法)
7.在onCreate之后设置fitSystemWindows并不会把ContentView往上挪或往下挪.
自己测试了一下,在根布局里添加fitSystemWindows = true之后,在Activity的onCreate里面是可以使用ViewCompat.setfitSystems(rootView,false)设置起作用的。但也只限于onCreate的时候。例如添加一个点击事件,在onClick里面setFitSystemWindows,是不会把RootView往下挪的。这种情况就需要一开始就确保fitSystem = false,然后需要往下挪的时候,给设置一个FrameLayout.LayoutParams的TopMargin就可以了。注意来回切换(全屏模式和着色模式之间切换)的时候要看下rootView的getTop,因为MarginTop设置了之后会导致Top!=0。
其实fitSystemWindows是在FitSystemWindowLinearLayout中添加Padding起效的,后期操作的Margin只是对其Child ContentFrameLayout进行操作。
所以,这种情况下我觉得直接全部弄成fitSystemWindows = false,先把statusBar后面的空间占据了再说,后面再通过手动设置Margin上下挪动。
8. 一些不要犯的小错误
在Theme中添加
<item name="android:fitsSystemWindows">true</item>这会导致Toast的文字往上偏移,所以,如果需要使用fitSystemWinow = true的话,请老老实实去xml中写
状态栏那一块如果你不去占据的话,而你又声明了windowTranslucentStatus,v21上默认的颜色应该是colorPrimaryDark(是的,AppCompat帮你照顾好了)v19上就是一片带阴影的白色(AppCompat不会在这个版本上帮你着色statusBar)。
6.0以上可以设置statusBar字体的颜色了,这个随便找找就有了
Ian Lake在medium上给出了对于fitSystemWindow的权威解释,非常有价值。
9. 下面这段话可能对于理解window有一定帮助
fitsSystemWindows, 该属性可以设置是否为系统 View 预留出空间, 当设置为 true 时,会预留出状态栏的空间.
ContentView, 实质为 ContentFrameLayout, 但是重写了 dispatchFitSystemWindows 方法, 所以对其设置 fitsSystemWindows 无效.
ContentParent, 实质为 FitWindowsLinearLayout, 里面第一个 View 是 ViewStubCompat, 如果主题没有设置 title ,它就不会 inflate .第二个 View 就是 ContentView.
另外,如果使用AppCompat,在api21以上,会自动将状态栏颜色设置为colorPrimaryDark。
最后感谢网上各位博主不辞辛苦写出来的干货,让我能够比较简单的复制粘贴他们的代码来检验,写博客真的很累。
Updates
这个是用来显示或者隐藏状态栏位置的文字的,其实也就是youtube上一个google dev的视频中的部分内容了,亲测好用,比如全屏播放视频的时候可以调用一下。
// This snippet hides the system bars.
private void hideSystemUI() {
    // Set the IMMERSIVE flag.
    // Set the content to appear under the system bars so that the content
    // doesn't resize when the system bars hide and show.
    mDecorView.setSystemUiVisibility(
            View.SYSTEM_UI_FLAG_LAYOUT_STABLE
            | View.SYSTEM_UI_FLAG_LAYOUT_HIDE_NAVIGATION
            | View.SYSTEM_UI_FLAG_LAYOUT_FULLSCREEN
            | View.SYSTEM_UI_FLAG_HIDE_NAVIGATION // hide nav bar
            | View.SYSTEM_UI_FLAG_FULLSCREEN // hide status bar
            | View.SYSTEM_UI_FLAG_IMMERSIVE);
}
// This snippet shows the system bars. It does this by removing all the flags
// except for the ones that make the content appear under the system bars.
private void showSystemUI() {
    mDecorView.setSystemUiVisibility(
            View.SYSTEM_UI_FLAG_LAYOUT_STABLE
            | View.SYSTEM_UI_FLAG_LAYOUT_HIDE_NAVIGATION
            | View.SYSTEM_UI_FLAG_LAYOUT_FULLSCREEN);
}
一旦使用了windowTranslucentSystemBar,你的Activity的Window中将不再拥有statusBarView和NavigationBarView(这也就是为什么api文档上说setStatusBarColor不能在设置了translucentFlag的前提下使用)
fitSystemWindows在大部分View中的实现都是加了一个padding
Chris Banes推荐的的获取statusBar的高度的方法
myView.setOnApplyWindowInsetsListener { View, inset, ->
  val statusBarSize = insets.systemWindowInsetTop
  return insets
}